Using SimulatorV2 with Eclipse
Last Page Update: 2018-10-19
This tutorial will guide you through setting up version 2 of the CS9668/CS4438 simulator with the Eclipse IDE.
Index
Before starting you should have the Java 11 JDK and the Eclipse IDE (SimRel 2018-09) installed on your computer. The latest version of the simulator should be downloaded and extracted into a known directory on your computer (downloaded here).
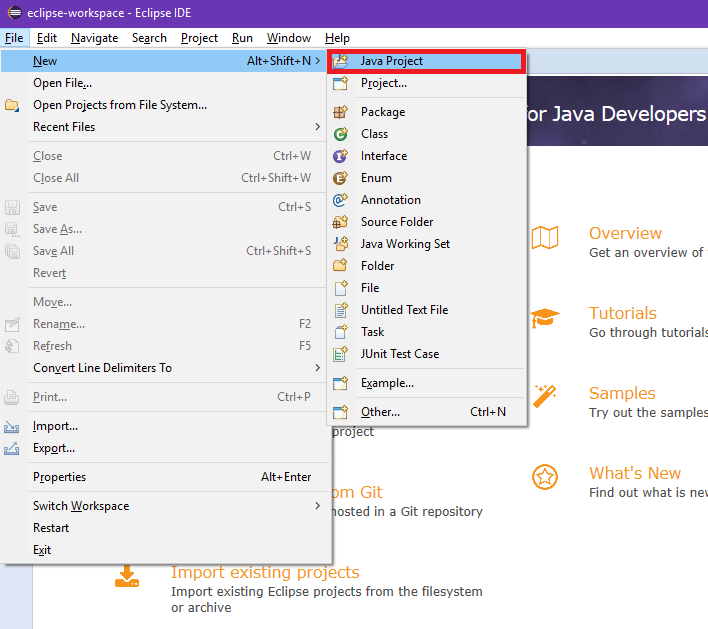
Create a new Eclipse Java Project using the File menu:
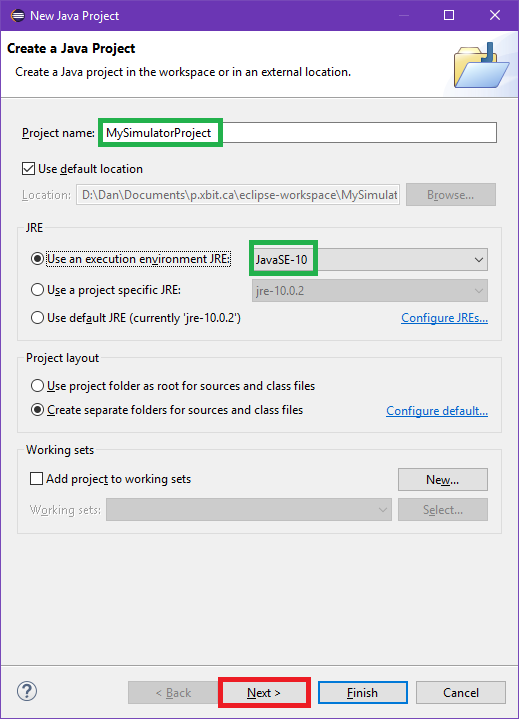
Give your project a name (in this example, we used "MySimulatorProject", but you may use anything you wish) and ensure that Java 10 or 11 is selected as the JRE. Once you have named the project and selected the correct JRE, click the "Next" button.
Uncheck "Create module-info.java file" and click the "Libraries" tab.

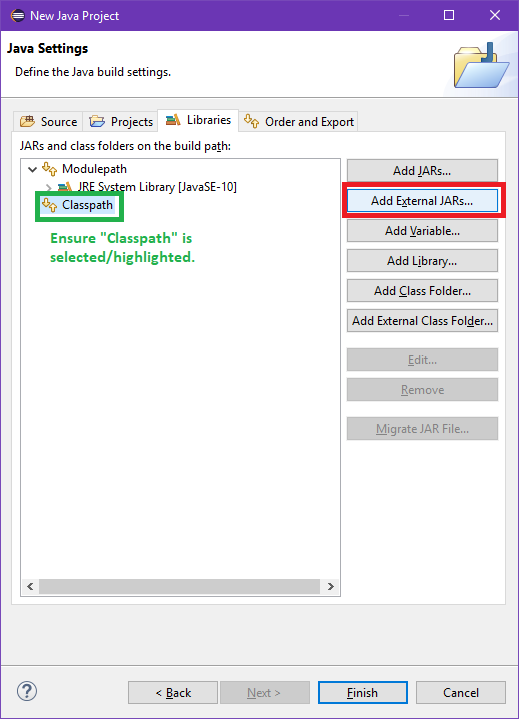
In the Libraries tab we need to add the SimulatorV2.jar file to the classpath. Select "Classpath" and ensure it is highlighted before clicking the "Add External JARs..." button.
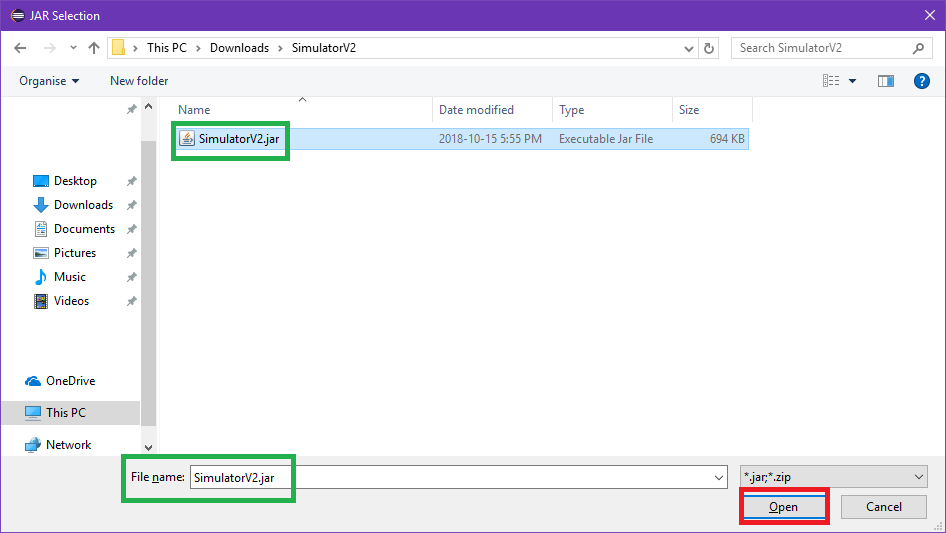
Navigate to the directory where you extracted the SimulatorV2.jar file to and select it. This must be the .jar file and not the .zip file. Click the "Open" button once you have located the SimulatorV2.jar file.
SimulatorV2.jar should now be shown under "Classpath" in the list of JARs and class folders on the build path. Confirm that SimulatorV2.jar is listed and click the "Finish" button.

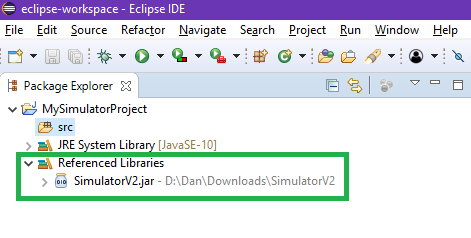
Your project should now be setup as shown below, with SimulatorV2.jar listed in the "Referenced Libraries". At this point you may create a new class for your algorithm (shown in the next step) and classes from the SimulatorV2.jar should be accessible in the IDE, however, some more setup is required to run the project (Step 3).
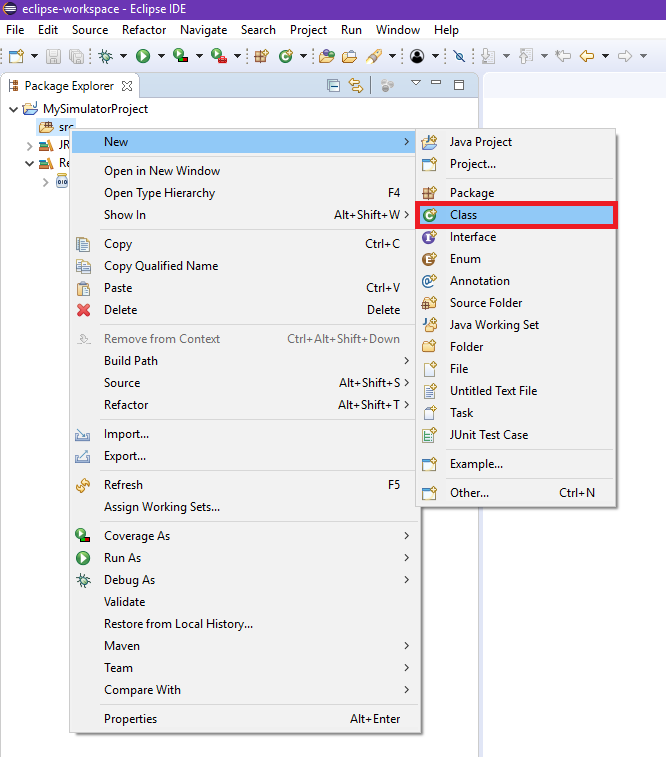
To create our algorithm we will need to make a new Java class that extends the simulator's abstract Algorithm class. We can add a new class to our Eclipse project by right clicking on the "src" directory in the Package Explorer and left clicking on "Class" in the "New" submenu as shown below.
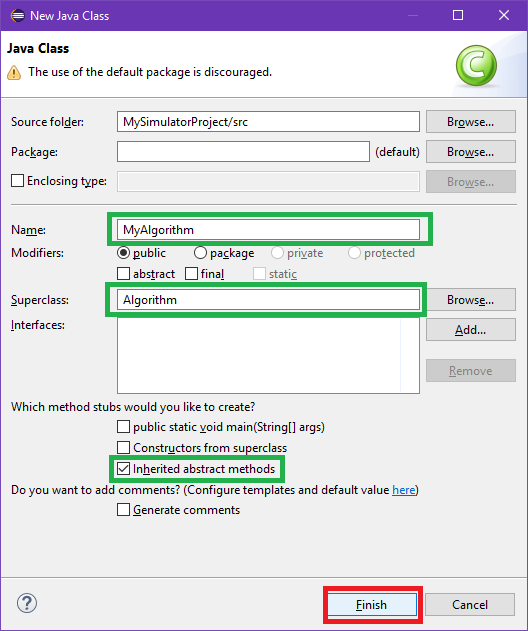
Name your new algorithm class. In this case we named it "MyAlgorithm" but you should name it something more appropriate. Note that this is the class name that you will use in the network configuration file, your Java code and will be the name of your .java file. Ensure that you set the "Superclass" field to "Algorithm" and that "Inherited abstract methods" is checked before clicking "Finish".
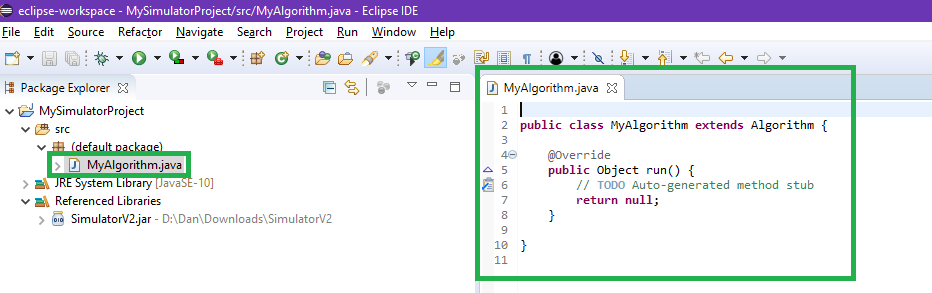
This should create a new .java file (in this case "MyAlgorithm.java") in your project containing your new Java class. Some basic code will be provided for you that extends the simulator's Algorithm class and implements the run method. Currently, this algorithm terminates immediately and returns a NULL result. You will have to implement your algorithm following the template provided here and the instructions on the simulator page.
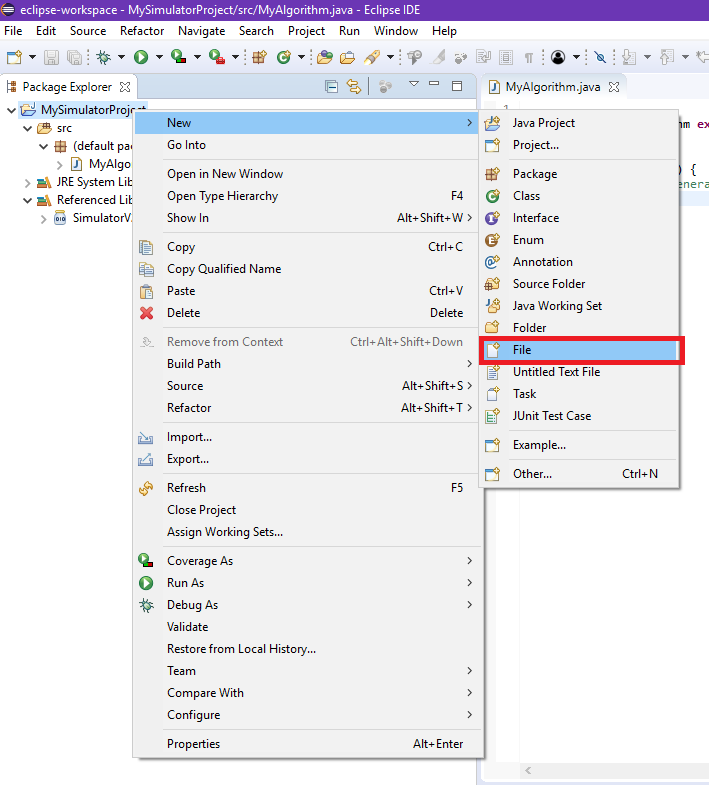
The next step is to create a network configuration file (following the direction found here) that will define the network your algorithm will run on and a number of other settings. To start, right click on the name of your project in the "Package Explorer" (in this case the name is "MySimulatorProject") and select "File" from the new submenu. This will create an empty file in the root directory of your project.
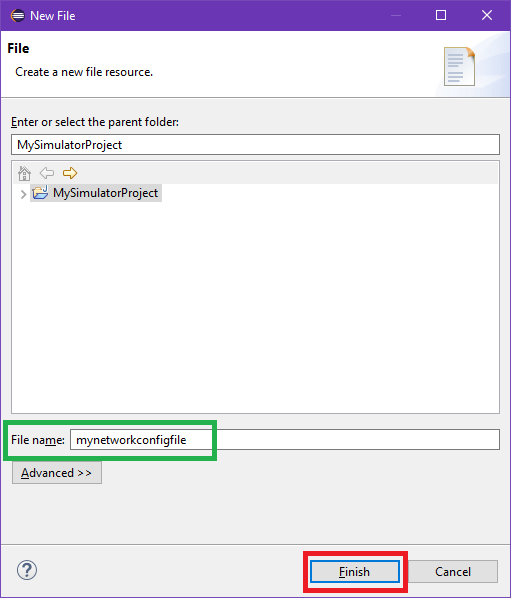
Give your network configuration file an appropriate name (in this case we just named it "mynetworkconfigfile") and click the "Finish" button.
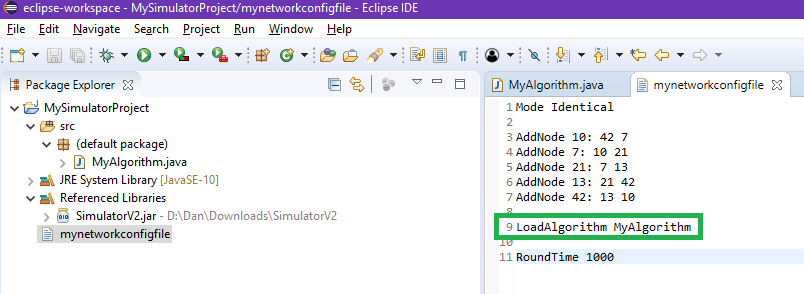
A blank file should be added to your project. You will have to input your network configuration into the file (it will not be generated for you) and ensure that it loads your algorithm. In this case our algorithm's class name is "MyAlgorithm" so we load it using "LoadAlgorithm MyAlgorithm".
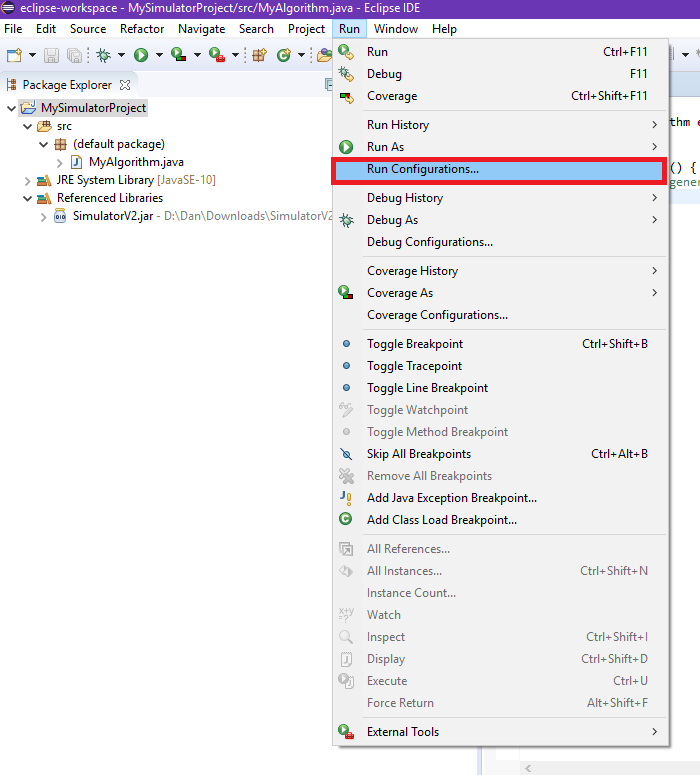
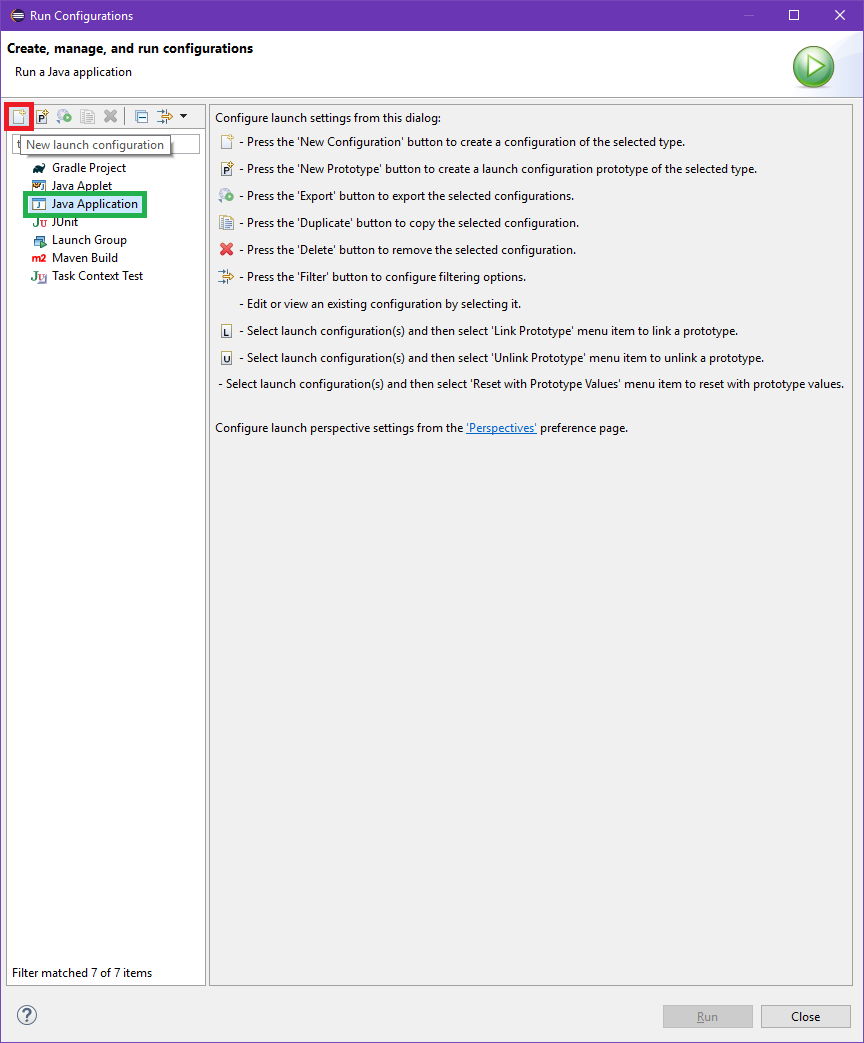
Before we can run the simulator using Eclipse we need to set up a new run configuration for the simulator. To start, click on the "Run" menu and select "Run Configurations..." as shown below:
Select "Java Application" and ensure that it is highlighted before pressing the new launch configuration button (looks like this:  ).
).
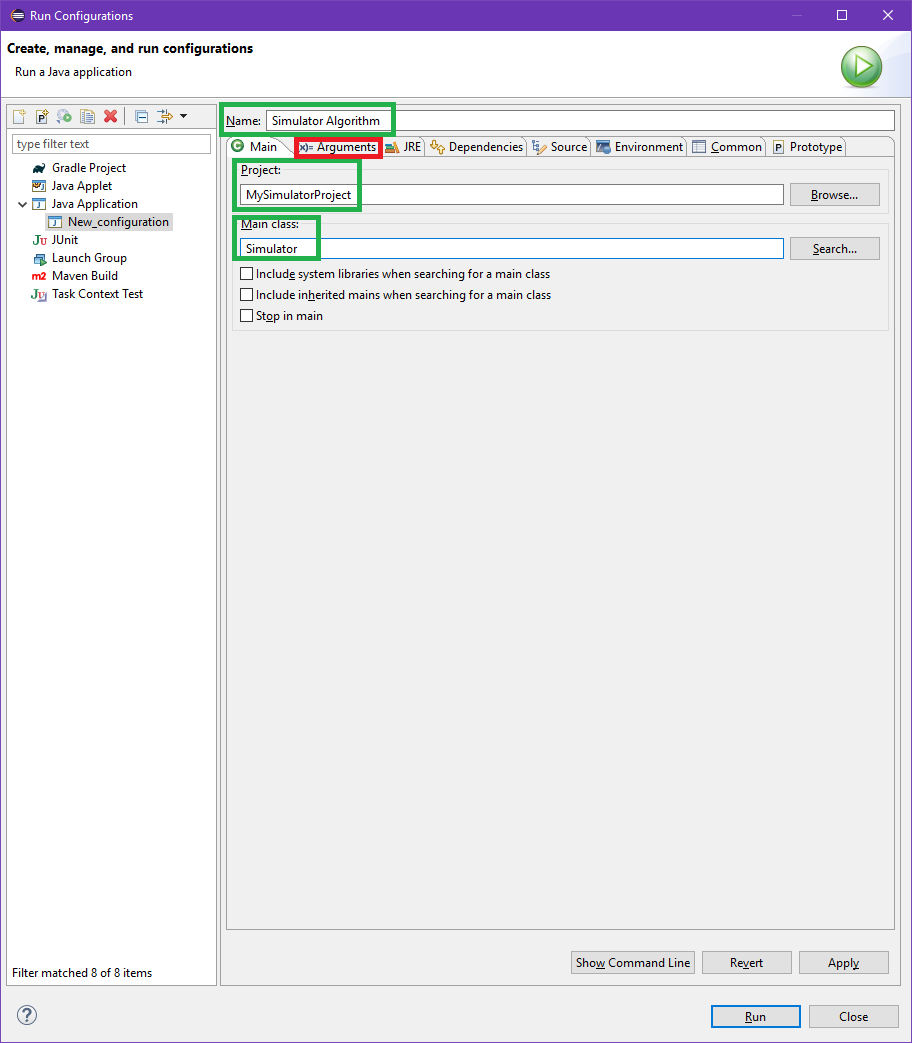
Give a name to the run configuration ("Simulator Algorithm" is suggested but not mandatory) and ensure that your project name is listed in the "Project" field (in this case our project name is "MySimulatorProject" but yours will be different). In the "Main Class" field ensure that "Simulator" is input exactly, this tells Eclipse that we will be running the main method in the Simulator class (from SimulatorV2.jar). Once finished, click on the "Arguments" tab (do not click "Run" or "Close" yet).
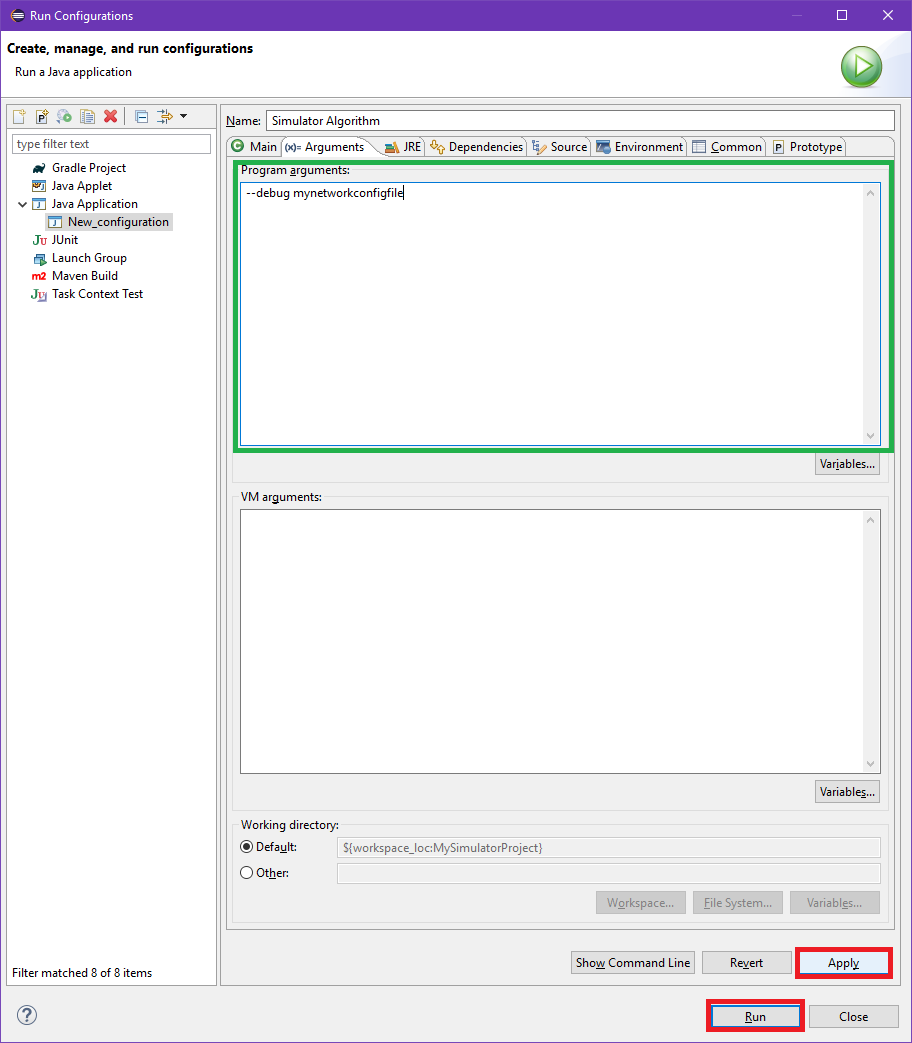
The Arguments tab allows us to provide runtime arguments to the simulator without using the command line our self. Any arguments input in the "Program arguments" text box will be passed to the simulator just like if we used the runsim script (See the "Running the Simulator" section of the simulator page for a list of possible arguments.). The last argument must be the name of your network configuration file that you created earlier (in this case we named it "mynetworkconfigfile" but yours will be different). In the example below, we also turn on debugging mode with "--debug", this pauses the simulator after each round and is recommended while working on your algorithm. After you are finished, click the "Apply" button and then click the "Run" button to give running the simulator a try.
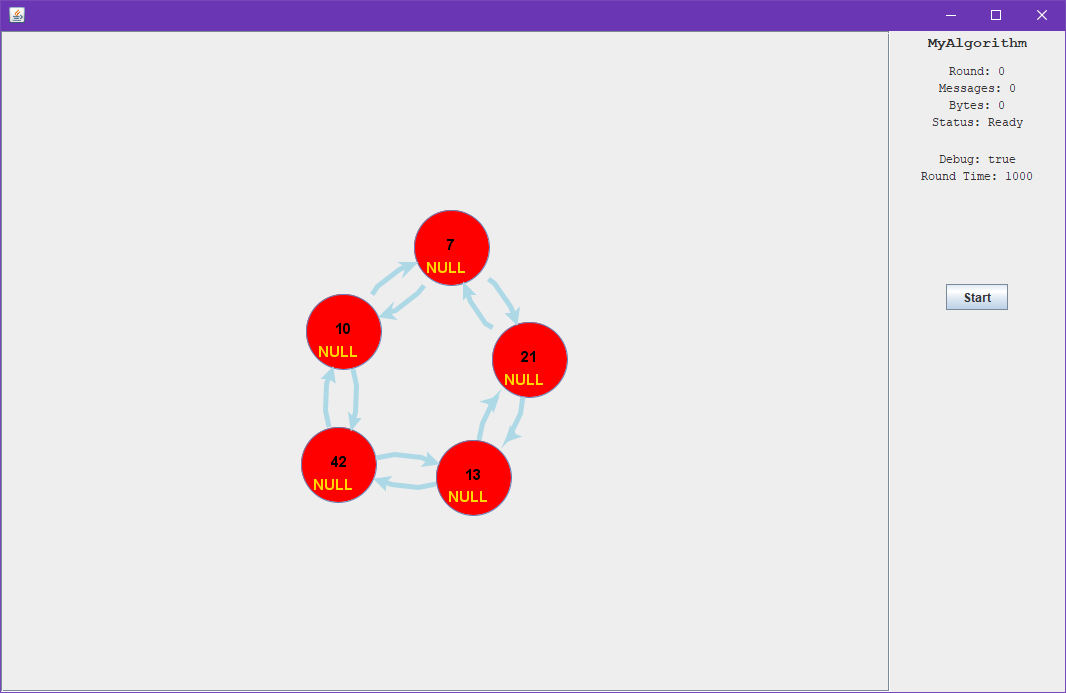
If everything was configured properly you should now see the simulator GUI and your algorithm running. In this case, each processor/node exits immediately with a NULL result as we have yet to implement our algorithm. You may stop the simulator by clicking the "X" in the top right of the window (may be a bit different depending on your OS).
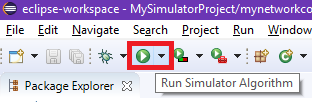
To run the simulator again, you can click on the run button in the Eclipse IDE.
To run a different algorithm on the simulator, you will have to either edit your network configuration file to load a different algorithm (using LoadAlgorithm) or edit your run configuration to use a different network configuration file (more ideal).
Back to Top